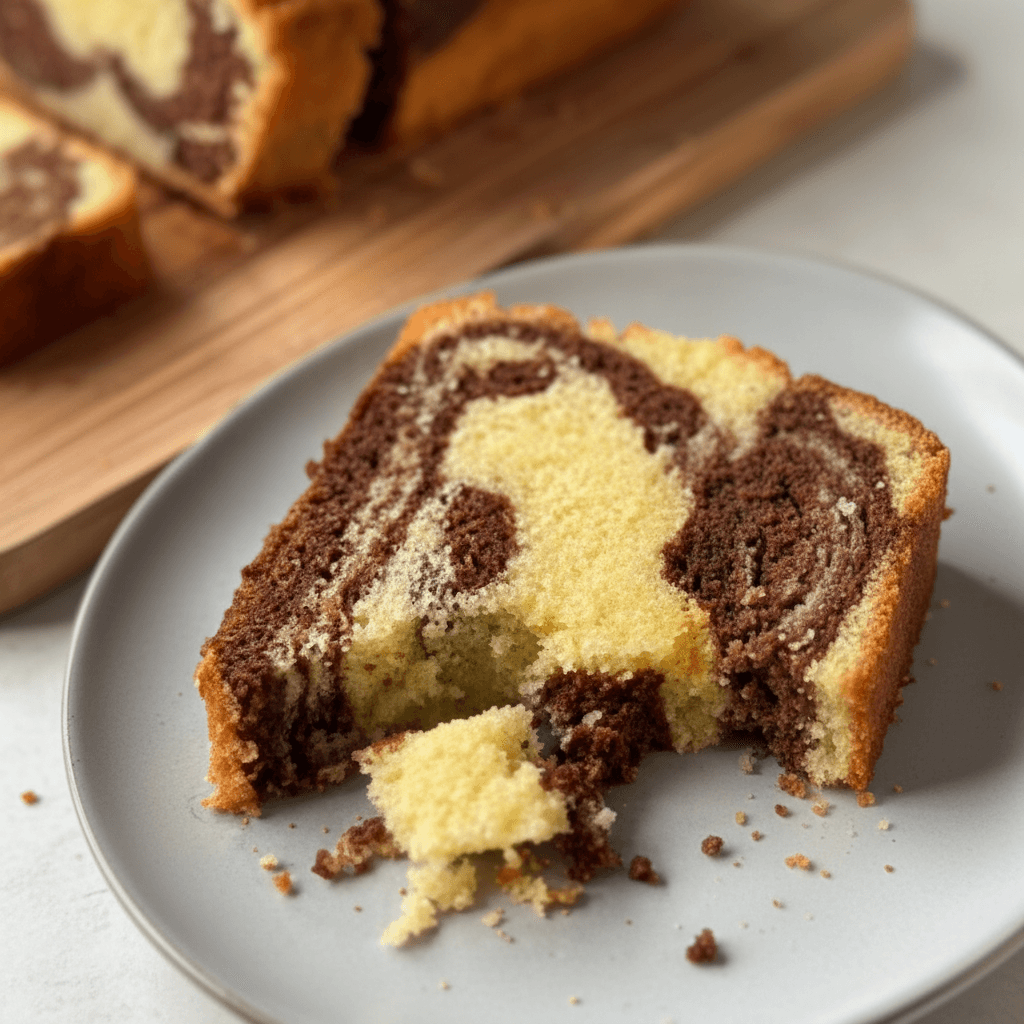
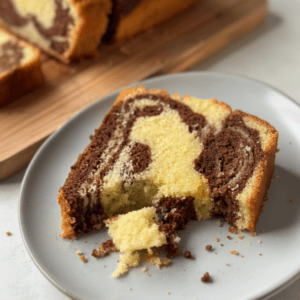
Delicious Moist Chocolate Marble Cake Recipe is the culmination of my 40 years in professional kitchens, and it is the single most requested dessert in my repertoire. When you slice into this cake, you aren’t just looking at a beautiful pattern; you are experiencing the perfect marriage of buttery Madagascar vanilla and deep, Dutch-processed chocolate. I have spent decades refining the ratio of fats to flour to ensure that every bite melts on your tongue while maintaining that structural integrity that makes a marble cake a true showstopper.
If you have ever struggled with a marble cake being too dry on the chocolate side or too dense on the vanilla side, you are in the right place. Most recipes treat the chocolate swirl as an afterthought, but in my kitchen, we treat it with the same respect as a five-star chocolate torte. This recipe ensures a uniform crumb that stays moist for days, thanks to a few “old-school” pastry chef secrets I’m about to share with you.
Why You Will Love This Delicious Moist Chocolate Marble Cake Recipe
There is a reason this specific formula has been a staple in high-end bakeries for decades. Here is why it will become your new go-to:
- Unrivaled Moisture: We use a combination of European style butter brands and a touch of sour cream to ensure the crumb never goes stale.
- Visual Elegance: The contrast between the dark cocoa and the golden vanilla batter is sharp and sophisticated—perfect for high-end photography.
- Simple Techniques: You don’t need a pastry chef certification to master the swirl; I’ll show you the exact “knife-drag” method used in professional ateliers.
- Versatile Pairing: It’s equally at home next to a morning espresso as it is served with a dollop of Chantilly cream at a dinner party.
Perfect for Hosting and Parties
When hosting, presentation is everything. I often suggest this recipe to clients who are looking for luxury kitchen remodel ideas because a beautiful cake sitting on a marble countertop is the ultimate “home-style” aesthetic. Whether you are using high-end KitchenAid stand mixer attachments or mixing by hand, this cake exudes a level of craftsmanship that guests will assume took hours of professional labor.
Ingredients You Need
To achieve that elite flavor profile, I recommend sourcing the highest quality ingredients possible. Your cake is only as good as its weakest component.
- Unsalted Butter: Use a high-fat European-style butter (82% butterfat or higher) for the richest mouthfeel.
- Granulated Sugar: Standard fine-grain sugar for perfect aeration.
- Large Eggs: Must be at room temperature to prevent the batter from curdling.
- Pure Vanilla Extract: Invest in high-quality vanilla extract brands like Nielsen-Massey; it makes a world of difference.
- All-Purpose Flour: A medium-protein flour (around 10-11%) provides the perfect structure.
- Dutch-Processed Cocoa Powder: This is non-negotiable for that deep, dark color and mellow chocolate flavor. Use the best organic cocoa powder you can find.
- Sour Cream or Full-Fat Greek Yogurt: This is my secret weapon for a tender, tangy crumb.
- Baking Powder and Salt: For lift and flavor balance.
- Boiling Water: To “bloom” the cocoa powder, unlocking its full aromatic potential.
How to Make Delicious Moist Chocolate Marble Cake Recipe
Step 1: Prep and Calibrate
Before you begin, ensure your oven is accurate. I always recommend checking your professional convection oven settings with an external thermometer. Preheat to 350°F (175°C). Grease and flour a standard loaf pan or a 9-inch Bundt pan.
Step 2: The Creaming Method
In your stand mixer, cream the softened butter and sugar for a full 5 minutes. Most home bakers stop too early. You want the mixture to be pale, almost white, and incredibly fluffy. This stage is where you incorporate the air that will help the cake rise.
Step 3: Emulsifying the Liquids
Add the eggs one at a time, beating well after each addition. If the mixture looks like it’s breaking, add a tablespoon of your measured flour. Stir in the vanilla extract and the sour cream. The sour cream provides the acidity needed to keep the gluten strands short, resulting in a “melt-in-your-mouth” texture.
Step 4: Incorporating Dry Ingredients
Sift the flour, baking powder, and salt. Alternating with a splash of whole milk, fold the dry ingredients into the wet mixture using a spatula. Do not overmix! Overworking the batter develops too much gluten, which will turn your “moist” cake into a “tough” one. Stop as soon as no flour streaks remain.
Step 5: Creating the Chocolate Concentrated Base
Take approximately one-third of your vanilla batter and place it in a separate bowl. In a small ramekin, whisk your best organic cocoa powder with 3 tablespoons of boiling water until it forms a smooth paste. Fold this chocolate paste into the smaller portion of batter. Blooming the cocoa in hot water ensures there are no bitter clumps and intensifies the chocolate notes.
Step 6: The Art of the Marble Swirl
Drop alternating dollops of vanilla and chocolate batter into your prepared pan. Once all the batter is in, take a butter knife or a skewer. Insert it into the batter and draw a “figure-eight” pattern through the layers. Do this only twice. The biggest mistake is over-swirling, which creates a muddy grey cake rather than distinct, beautiful marbling.
Step 7: Baking to Perfection
Bake for 45-55 minutes. You are looking for a toothpick to come out with just a few moist crumbs attached. If you are shipping this as part of a gourmet chocolate cake delivery service or giving it as a gift, ensure it is completely cool before wrapping to prevent condensation.
Expert Tips for Success
- Temperature Matters: Never use cold eggs or cold butter. Cold ingredients will not emulsify, leading to a heavy, greasy cake.
- Sift the Cocoa: Cocoa powder is notoriously lumpy. Always sift it before blooming it to ensure the chocolate batter is as smooth as silk.
- Don’t Peek: Opening the oven door in the first 30 minutes can cause the cake to collapse. Trust your timer and the aroma filling your kitchen.
- The “Bounce” Test: Gently press the center of the cake; if it springs back, it’s done. If your fingerprint stays, it needs 5 more minutes.
Frequently Asked Questions
How long does Delicious Moist Chocolate Marble Cake Recipe stay fresh?
When stored in an airtight container at room temperature, this cake remains incredibly moist for up to 4 days. If you find yourself with leftovers (unlikely!), it toasts beautifully with a bit of salted butter.
Can I make this ahead of time?
Absolutely. In fact, many of my clients prefer the flavor on day two, as the chocolate and vanilla have had time to “meld.” You can also freeze the baked cake for up to 3 months. Wrap it tightly in plastic wrap and then aluminum foil to prevent freezer burn.
Conclusion
Creating a Delicious Moist Chocolate Marble Cake Recipe is an act of love and a testament to the beauty of classic baking. It doesn’t require flashy decorations or complex frostings; the beauty is in the crumb and the swirl. I hope this recipe brings as much joy to your kitchen as it has to mine over the last four decades.
Did you try the “figure-eight” swirl? I’d love to see your results! Leave a comment below and give this recipe a 5-star rating if it’s the best marble cake you’ve ever tasted.
Delicious Moist Chocolate Marble Cake Recipe
Ingredients
- 1 cup Unsalted European Style Butter (softened)
- 1.5 cups Granulated Sugar
- 3 large Eggs (room temperature)
- 2 tsp Pure Vanilla Extract
- 0.5 cup Sour Cream
- 2 cups All-purpose Flour
- 1 tsp Baking Powder
- 0.5 tsp Salt
- 0.25 cup Dutch-processed Cocoa Powder
- 3 tbsp Boiling Water
Instructions
- Preheat oven to 350°F and grease a loaf pan.
- Cream butter and sugar for 5 minutes until light and fluffy.
- Add eggs one at a time, followed by vanilla and sour cream.
- Gently fold in sifted flour, baking powder, and salt.
- Separate 1/3 of the batter. Mix cocoa powder and boiling water, then fold into the smaller batter portion.
- Alternate dollops of vanilla and chocolate batter in the pan. Swirl once with a knife.
- Bake for 50 minutes or until a toothpick comes out clean.